Many travel and landscape photographers, including myself, try to avoid shooting scenery with a clear blue sky. As much as we like seeing puffy or stormy clouds to spice up our photographs, we have no control over what nature provides each day. Sometimes we get lucky and capture beautiful sunrises and sunsets with blood red skies, and other times we are stuck with a clear, boring sky. When I find myself in such a situation and I know that the next morning will be clear, I sometimes explore opportunities to photograph the stars and the Milky Way at night. I am sure you have been in situations where you got out at night in a remote location and saw an incredibly beautiful night sky with millions of stars shining right at you, with patches of stars in a “cloudy” formation that are a part of the Milky Way. If you do not know how to photograph the night sky and the Milky Way, this guide might help you in understanding the basics.
In this article, we will only go over the basics, because astrophotography can get very complex, especially for capturing deep space photos of nebulas, constellations and star systems. Some photographers utilize telescopes, specialized robotic heads with ultra-precision and CCD cameras specifically created for astrophotography worth tens of thousands of dollars, to create amazingly beautiful photographs that are extremely hard or even impossible to capture with a regular digital camera. I will skip through these complex topics and rather focus on what you can capture with a camera you already own, whether it is a DSLR, a mirrorless camera or even an advanced point and shoot.
What You Will Need
Before we start talking about photographing the Milky Way, let me first go over what you will need in terms of gear and software:
- An Advanced Camera – you will need a camera that allows full manual exposure control of aperture, shutter speed and ISO. You also want the camera to be able to focus manually, since focusing at night will surely be a challenge for any autofocus system. Ideally, you need an advanced DSLR or a mirrorless camera that can handle noise well at high ISOs (more on this below). A dedicated astro-camera like the Nikon D810A is going to be the top choice for astrophotography, but that’s for those that want to explore astrophotography beyond the scope of this article. Some point and shoot cameras might be suitable for the job with manual controls, but the results will be obviously much inferior, especially on small sensor point and shoots.
- A Fast Lens – if you use an interchangeable lens camera, I would recommend to use a good, fast-aperture wide-angle lens (ideally in the f/1.4 – f/2.8 max aperture range). Top choices for photographing the stars are fast prime lenses that do very well wide open. My favorite lenses for night photography are the Nikon 14-24mm f/2.8G and the Nikon 20mm f/1.8G. Both are superb performers at their maximum apertures (wide open), so they are very suitable for night photography. But there are many more lens choices available that perform exceptionally well for night photography. We have written an article on best Nikon lenses for astrophotography, listing both native and third-party options that also work well on other systems, so I would recommend that you check out that article. If you have a slow lens or you need to stop down your lens to get the maximum sharpness, you will have to crank up the ISO, which will result in grainy photos. That’s why a fast lens is an ideal choice. If you shoot Canon, you can get similar lens choices as Nikon and the value is going to be with third party lenses from Samyang / Rokinon. My top recommendation for astrophotography is the Rokinon SP 14mm f/2.4 (Canon mount), which shows excellent performance when stopped down to f/2.8 and it does not suffer from heavy coma like many other lenses do.
- A Sturdy Tripod – you will be shooting long exposures (15 seconds and longer), so a sturdy tripod is a must-have. You do not want a flimsy tripod that will shake like crazy during the exposure, especially if there is light wind. Make sure to check out our detailed guide on choosing a tripod for more information.
- Sky Map App – this one is optional, but something I would highly recommend. A good sky map app such as Star Walk could show you exactly where the Milky Way is or will be, which can help a great deal with planning your shots. Another great app that I personally use is PhotoPills and it has an excellent Night AR feature that can be very helpful for planning.
- Post-Processing Software – you definitely want to process your shots in good software to get the best quality results and bring out the details. I would recommend either Adobe Photoshop or Photoshop Elements for astrophotography. Lightroom can be useful as well, but it is not going to be as flexible to do things like levels and advanced cloning / spot removal tools (to remove planes and other objects from the shots, etc). Post-processing is a big part of astrophotography, so I would highly recommend to get good software for the job if you do not already have it. Further down below, I will show you how to take some simple steps in Photoshop / Elements to enhance your Milky Way photos.
- Flashlight – a good flashlight is not only useful to find a good spot at night, but can also be used for light painting, if you have interesting foreground elements.
There are other things you might need, such as a remote camera trigger (for 30+ second exposures), hand / leg warmers (if shooting in cold) and more, but those are optional or depend on conditions and what you are trying to achieve.
Location and Light Pollution Considerations
If you live in a big city, it will be extremely difficult to capture the night sky and the Milky Way. Big city lights can be a huge problem due to air and light pollution, so it is best to get out of town/city and find a good location that does not have such problems. Sometimes it means driving several hours away from where you live. You might not see the light pollution with your eyes, but the camera sure will!
Remote national parks and wilderness areas are ideal for night photography, because the sky is crystal clear and there are no lights around. Use the Dark Sky Finder website to find the best locations with minimal light pollution.

Focusing
Before we talk about exposure settings, let’s first go over some important steps in ensuring that we end up with properly focused shots. Focusing at night can be a challenging and frustrating experience because the autofocus system on your camera will have very little contrast to be able to acquire proper focus. The best thing to do is to compose your shot, set one focal length (if using a zoom lens) and once you manually acquire perfect focus, not to touch the focus or zoom rings until you are completely done. Personally, I turn off autofocus right away and only rely on manual focusing using Live View – the goal is to set focus to infinity. Some people say that using lens markers to set focus to infinity is a good practice, but in reality, unless you have an old manual focus lens with more or less precise infinity markings, I would not rely on those. Even a slight focus error on a modern high-resolution sensor will make the stars appear like circular blobs instead of defined stars, so your focus technique is critical.
So what is the best way to get perfect focus? I often utilize a number of different techniques using camera’s Live View. Once you set your lens to Manual Focus and turn Live View on, zoom in to 100% and point your camera at the brightest source of light in the sky, which is usually the moon. Move the focus ring until you can clearly see the defined shape of the moon and simply turn off Live View – you are done. If the moon is not in the sky, try to find another source of light – perhaps a very bright star or some distant light. If you do not have either one of those, then another option is to turn your flashlight on and set it far enough away from you that it is at infinity, then focus on the flashlight using Live View. Some Live View modes in cameras are very good and will “boost” the night sky and reveal the stars. If you can see the stars in Live View, then you do not need to use any of the above techniques – just rotate the focus ring until the stars appear sharp. And lastly, if nothing works out, you can try using the infinity mark on top of the lens and take sample shots to see if focus is properly acquired or not. If you see blurry stars when zoomed in to 100%, then you know that you need to rotate the focus ring a tad to get better focus. It will take you some time to get it right, but it is definitely worth doing this right, than end up with blurry photos.
Now, if you have a foreground object in your shot, you obviously want both the foreground and the stars to be in perfect focus. Since you are shooting at wide open aperture, how do you achieve that? Well, the answer is in a technique called “focus stacking”, except you are probably going to take two images, with one focused on the sky and the other focused on your foreground. Then you use a blending technique in Photoshop to merge the two shots into a single composite, with perfect focus on both. Spencer has written an excellent guide on focus stacking, so if you want to find out more about the technique, check out the link!
Camera Settings
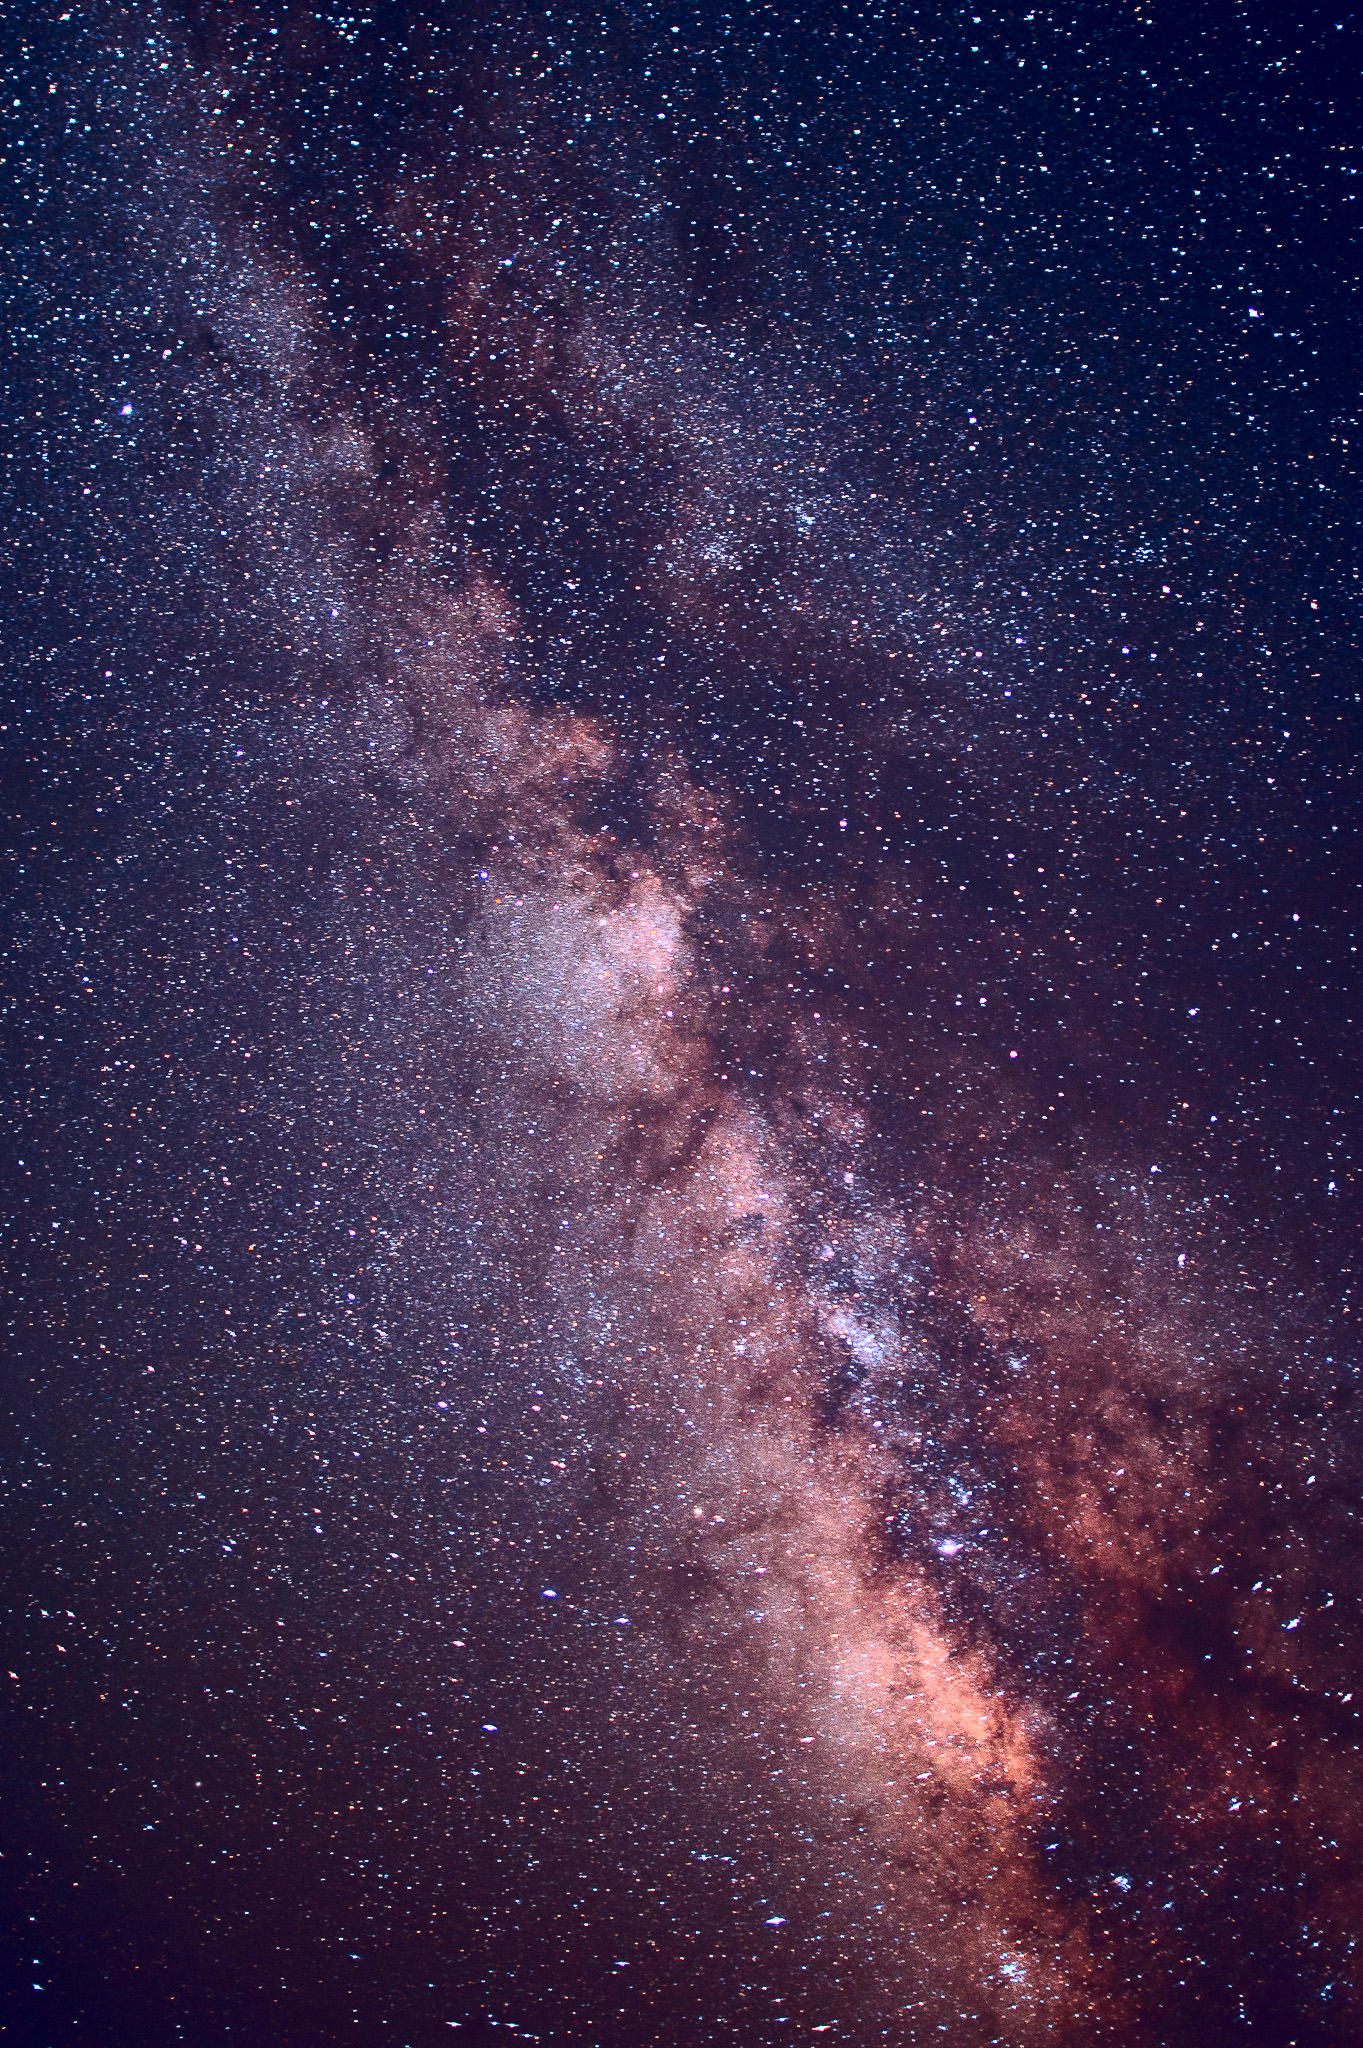
While the sky might look magnificent at night, with millions of stars easily visible to your eyes, it does not mean that your camera will be easily able to capture it. Your eyes get adjusted to low light at night, which means that you are seeing everything at very high sensitivity levels, with the iris wide open, at its maximum size. So if you want your camera to be able to capture the night sky as you see it (and perhaps even better than that), you will need to apply the same technique – use high ISO sensitivity levels and shoot at large apertures. This is where your camera and lens choices will play an important role on what you will be able to achieve. If you have a fast prime lens that performs well at its maximum aperture without introducing too much coma, you do not have to use very high ISO levels on your camera, which means less grain to deal with when post-processing your Milky Way photos. For example, the first image in this article was captured using the Nikon D3s and 24mm f/1.4G lens at f/1.4, ISO 1600 and 20-second long exposure. If I wanted to keep the length of the exposure the same and used a slower lens, say f/2.8 (two stops slower), I would have to increase my camera ISO from 1600 to 6400, which is a big difference.
So where do you start and what is the most important camera setting? What I would do first, is start out by determining the length of exposure. And this is where it gets tricky, because if you do it wrong, you will either end up with a black sky and a couple of stars, or the stars will look like lines instead of dots, commonly referred to as “star trails”. Those can look great in some shots, but star trail photography requires completely different techniques centered around the north star and obviously won’t work for Milky Way shots. Remember, our planet constantly rotates, and since we are shooting from a tripod that is fixed in one position, we really have to be careful about timing each exposure, as we need to keep stars as dots in our shots.
The 500 / 600 Rule
This one has a confusing name, because some people refer to this method as the “500 Rule”, while others go with the “600 Rule”. Basically, to determine the optical length of exposure, we take one of the two numbers and divide it by the focal length of the lens to get the optimal shutter speed. So if you are shooting with a 20mm lens on a full-frame camera using the 500 rule, you take 500 and divide it by 20, which yields 25 seconds – that’s the longest shutter speed you should use before those stars start changing into trails. If you use the less conservative “600 Rule”, you end up with a 30 second exposure. Personally, I never had success with the “600 Rule”, as it always results in star trails, even when shooting with a low-resolution camera. The “500 Rule” for me is the maximum – in fact, I only use it as a reference and often end up reducing my shutter speed even more in order to have no star trails in my photos. Now if you go with a longer focal length lens, your exposure time will get shorter using the same math, so keep that in mind when photographing the Milky Way.
JPEG or RAW?
If you are still shooting JPEG, slap yourself in the face – time to move to RAW and finally explore its benefits, especially when it comes to photographing the Milky Way. You want to shoot RAW for astrophotography, because you will often find yourself adjusting things like white balance, which you might not be able to change in JPEG images. There are many other benefits to shooting RAW – see my RAW vs JPEG article for more details on why you should stay away from JPEG for night photography.
Camera Mode
Whenever doing any type of night photography, you should always be shooting in full manual mode, as there is simply not enough light for your camera’s meter to calculate the right exposure. This means that you need to turn off Auto ISO first, then set aperture to the maximum aperture like f/1.4, then the length of the exposure / shutter speed based on the “500 Rule” (typically between 20 to 30 seconds), followed by ISO (which I would set to 1600 as the base and move it up or down as needed). If you cannot clearly see the Milky Way in your shot after you take your first shot, you will need to raise ISO to a higher number like ISO 3200. Since you are shooting RAW, white balance does not matter.
Foreground Elements and Composition
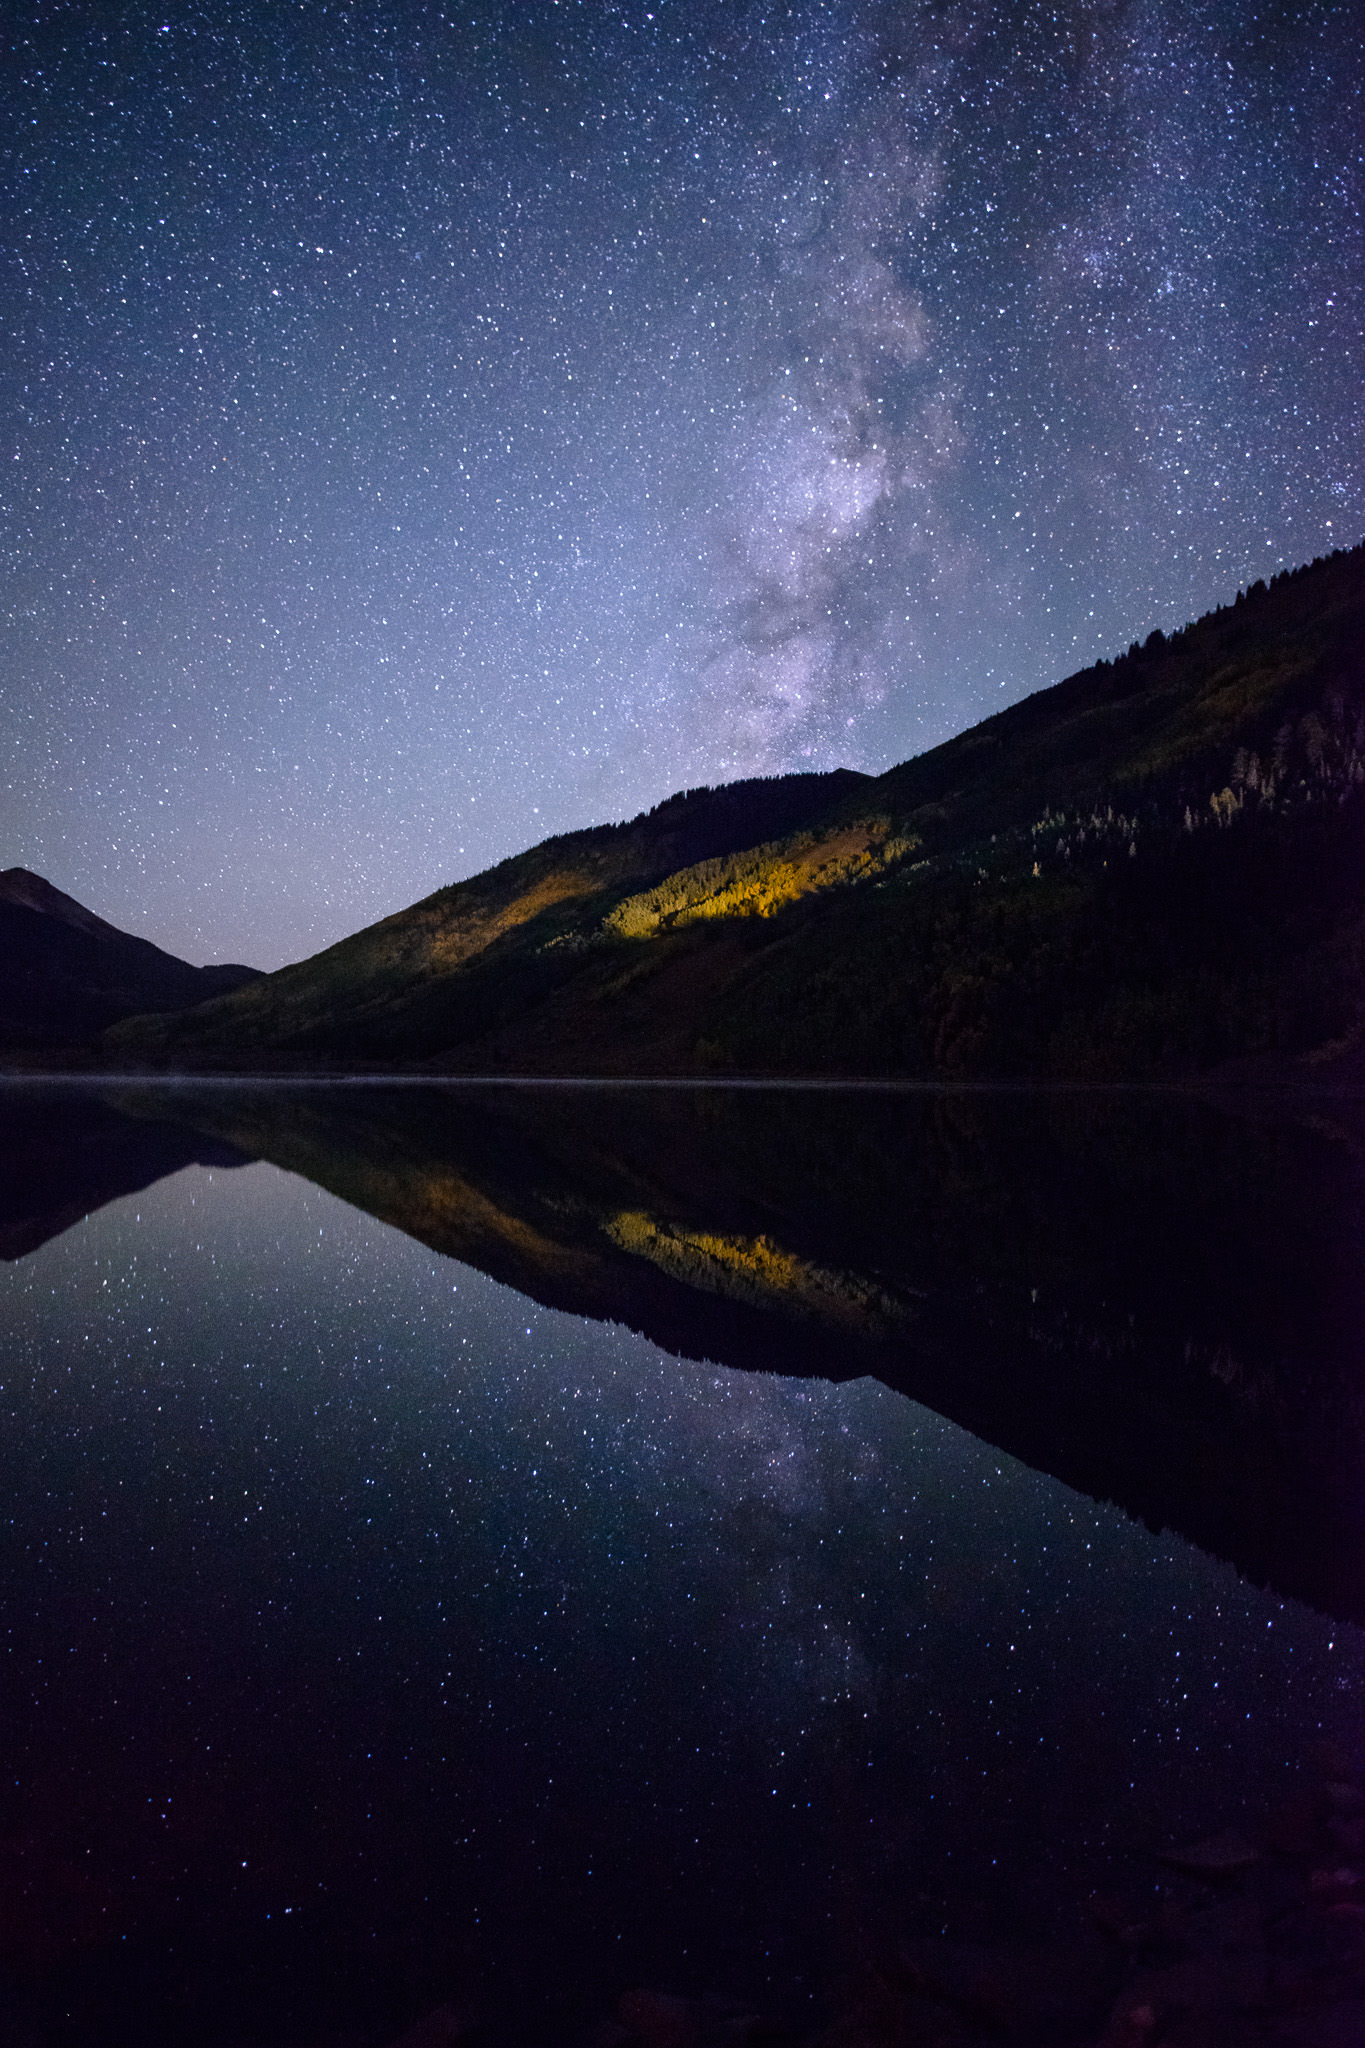
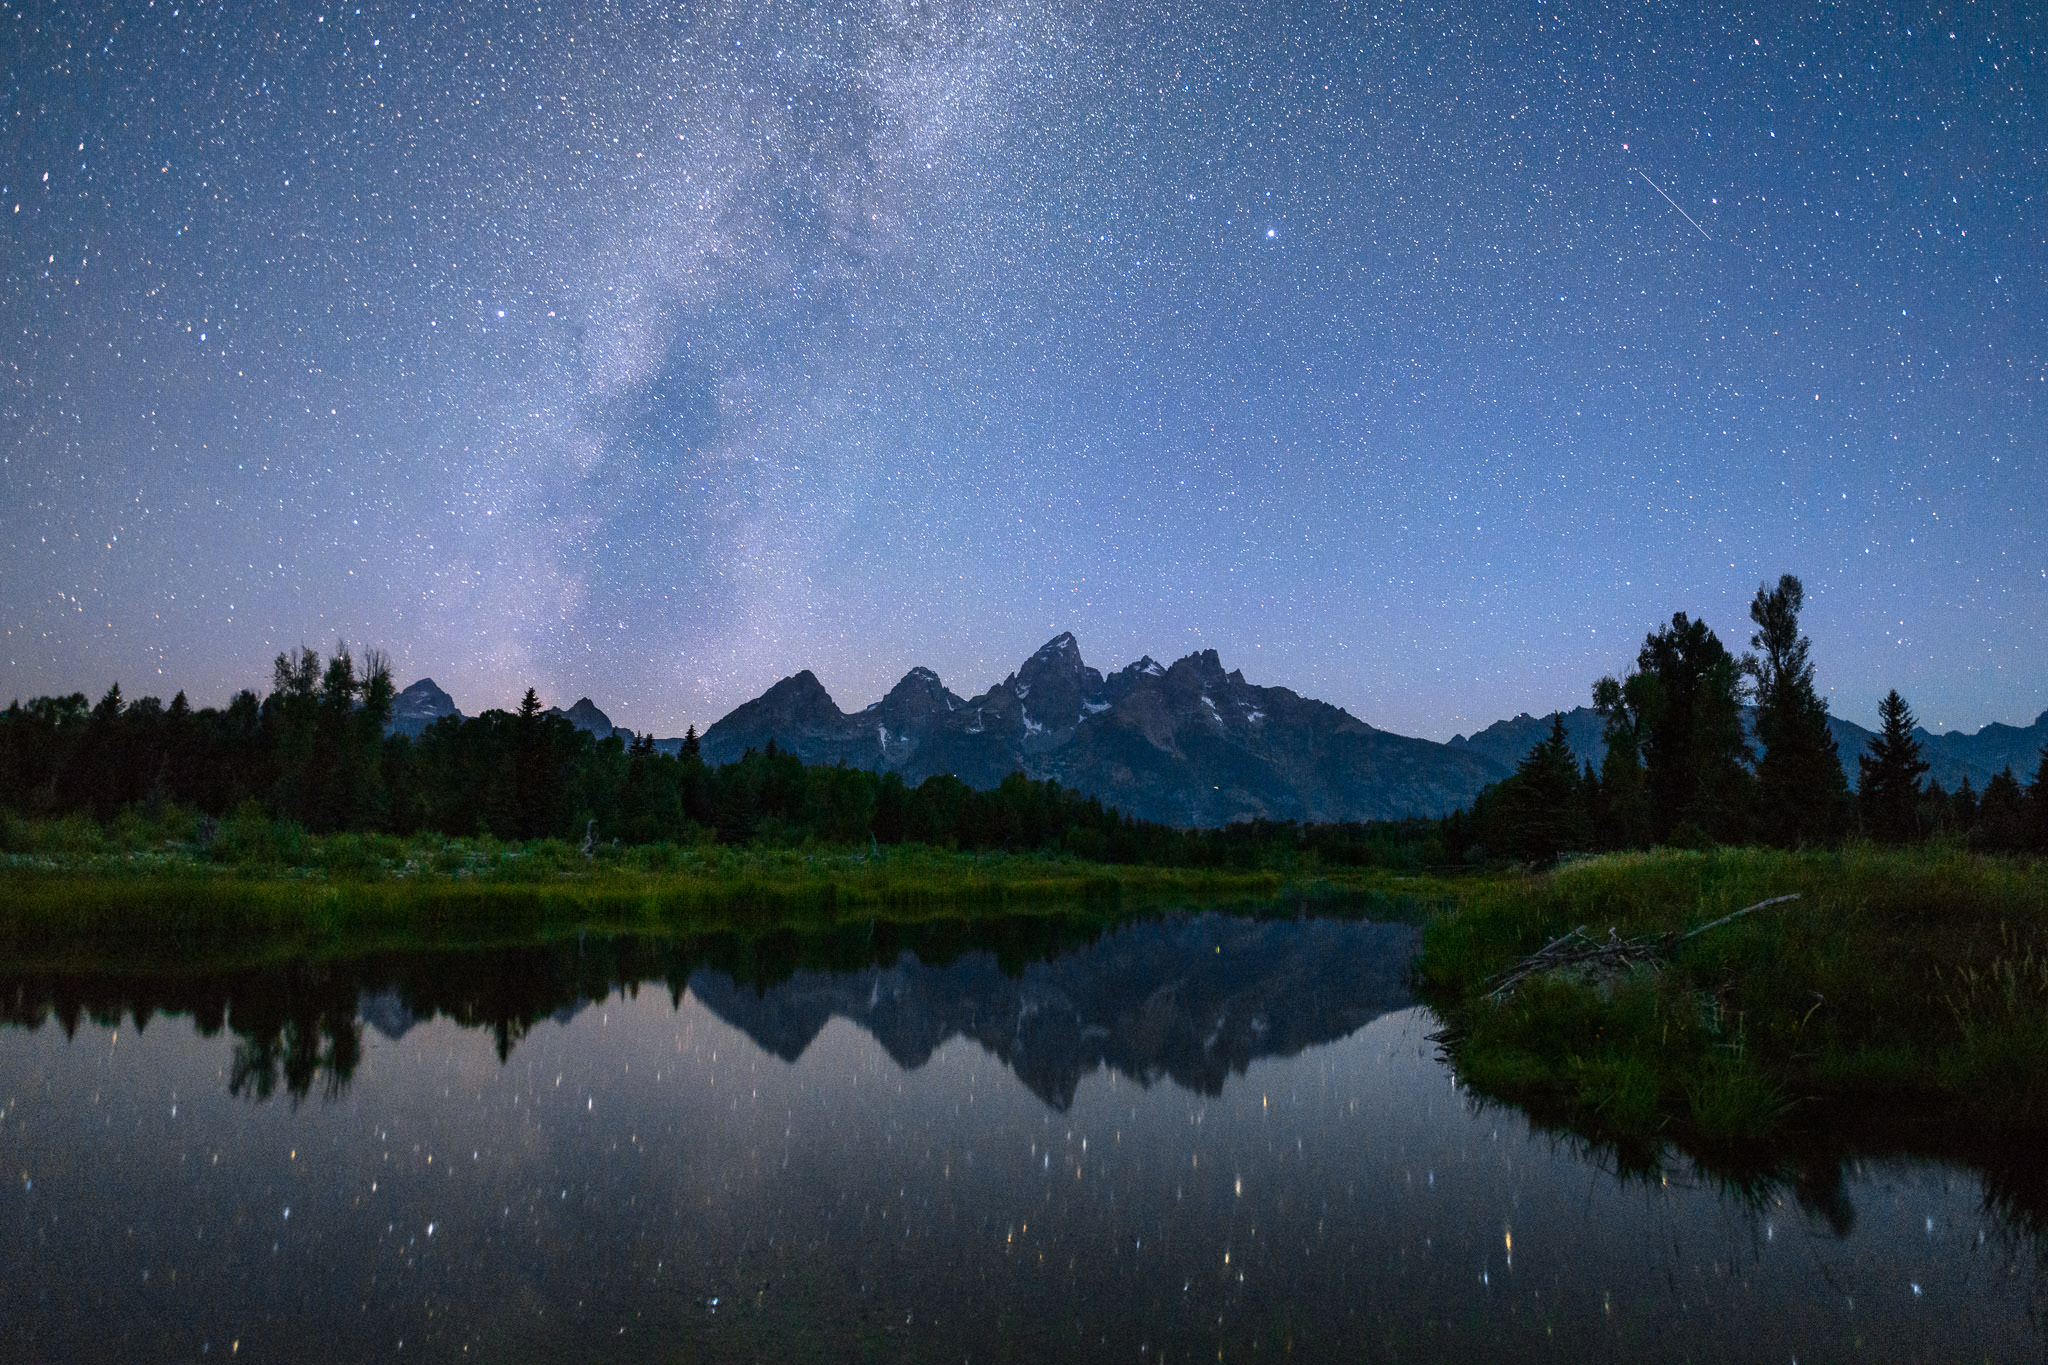
While capturing a shot of the Milky Way as shown in the beginning of this article can be rewarding, it is often boring to just shoot the Milky Way by itself. The best thing to do for these types of shots is to incorporate interesting foreground elements into your shots. Whether it is a beautiful mountain, a surreal lake, a rock or some other interesting object, it will surely make the photo much more appealing to the viewer’s eye. These shots can be hard to plan and require some prior research to determine the location of the Milky Way but, if you get it all right, all that effort will surely pay off. If you are blessed with a beautiful moonlight that illuminates your subjects, you might come back with killer pictures that will surely deserve a place on your wall. Here is a picture that I captured a couple of years back of Maroon Bells, taken at night:
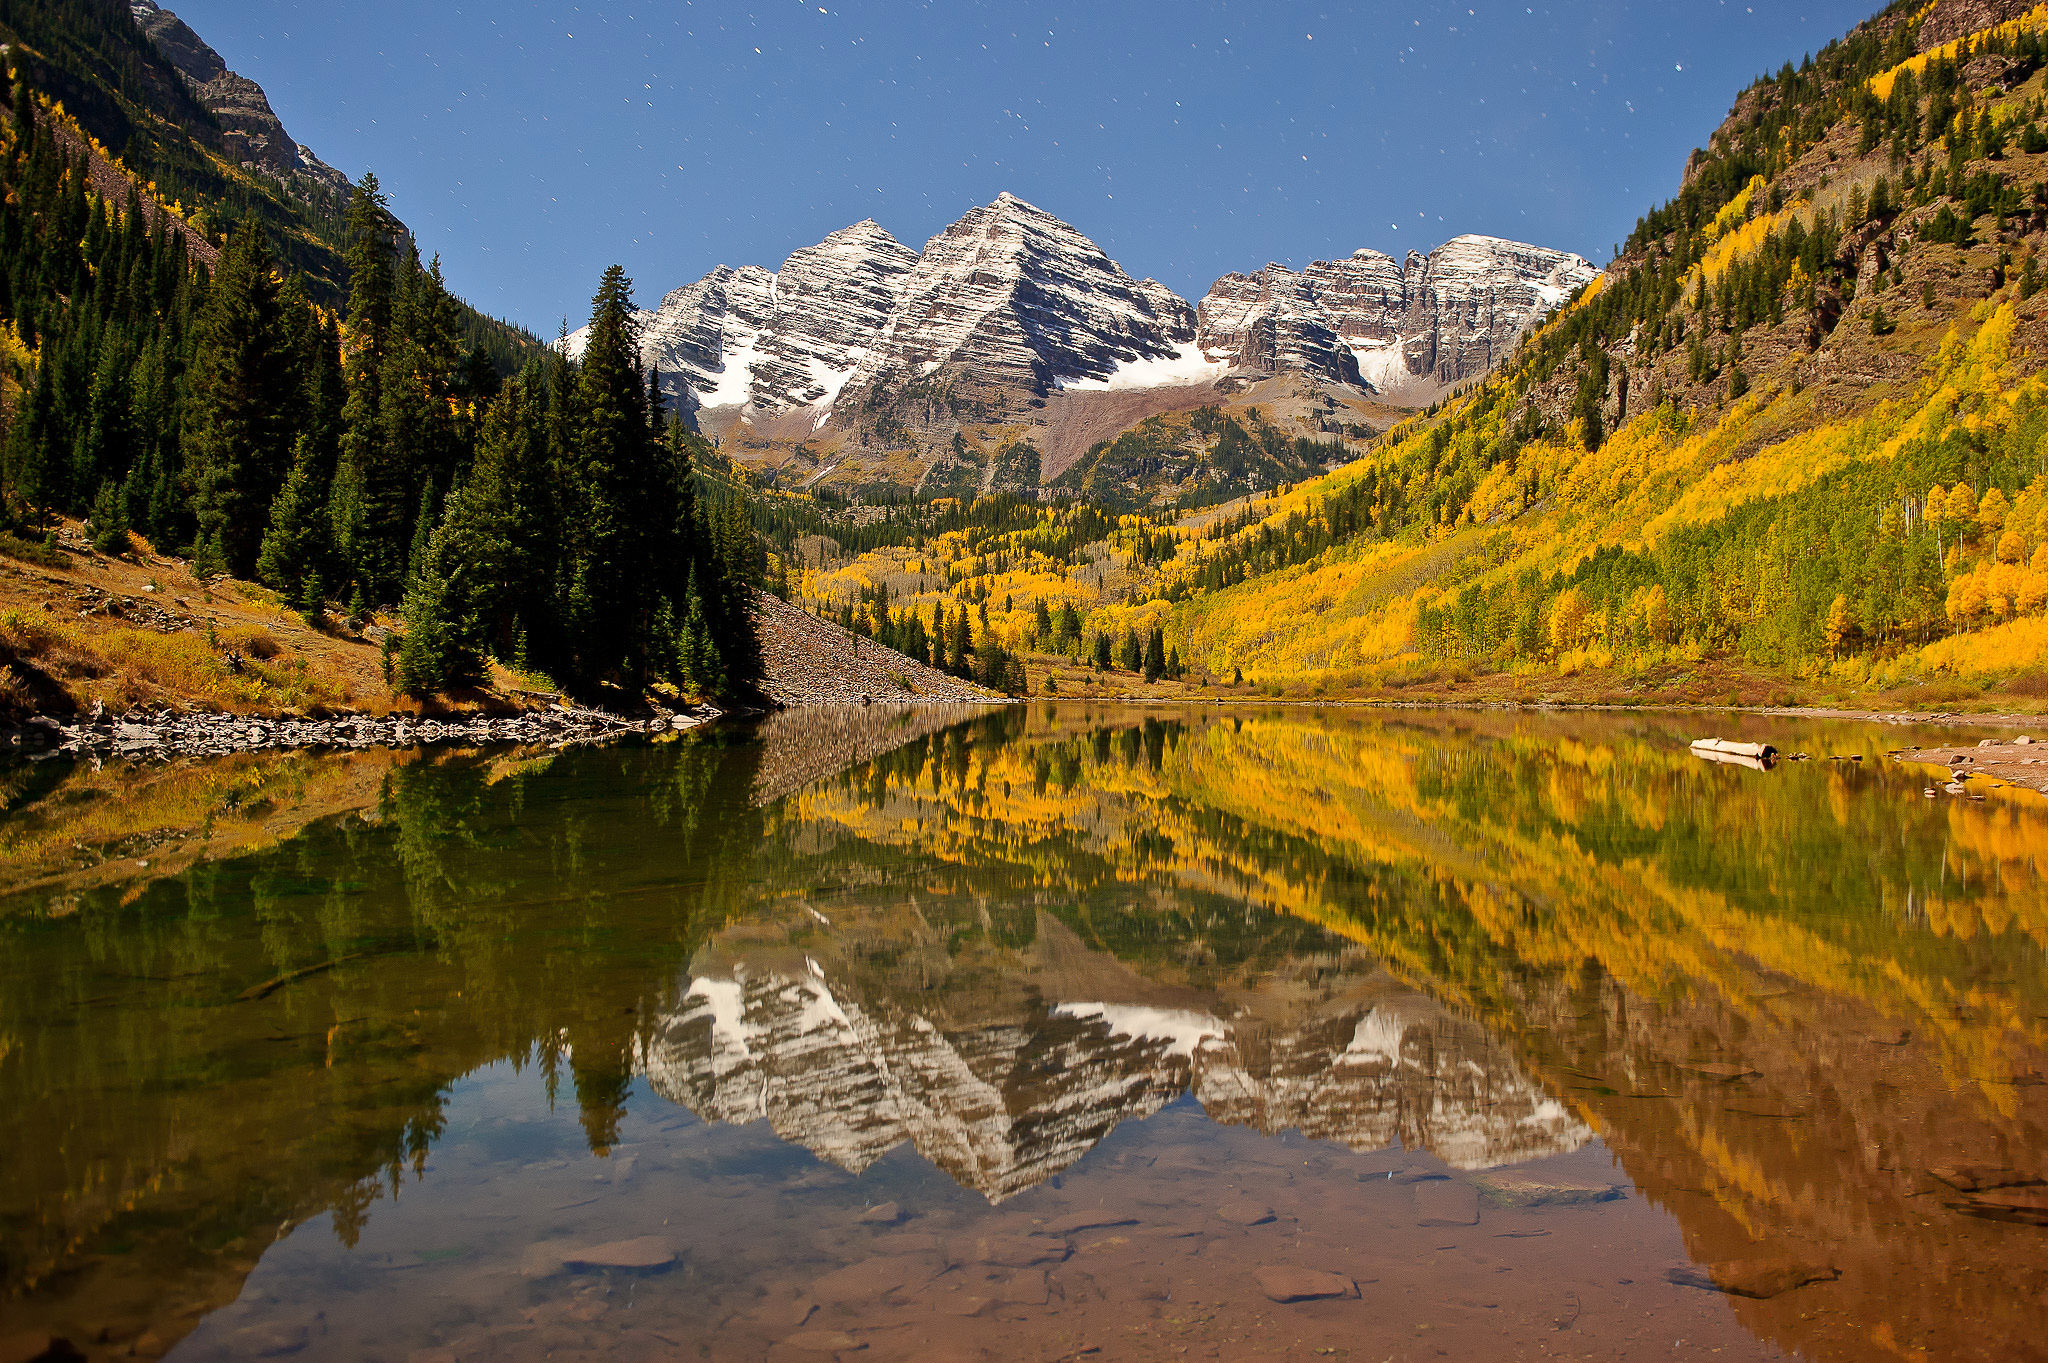
While the Milky Way is not seen above the mountain tops, it is still pretty incredible that the shot was taken at night. The whole scene was illuminated just by moonlight! If you look closely, you will see that the stars are slightly trailed – that’s because I broke the “500 Rule” with a 30 second exposure @ 29mm. I did that because I wanted a single shot that captured both the sky and the scenery, and I wanted to shoot at lower ISO to get the best image quality. I also stopped down the 24-70mm f/2.8G lens that I used that day to f/3.2 to get a little sharper corners.
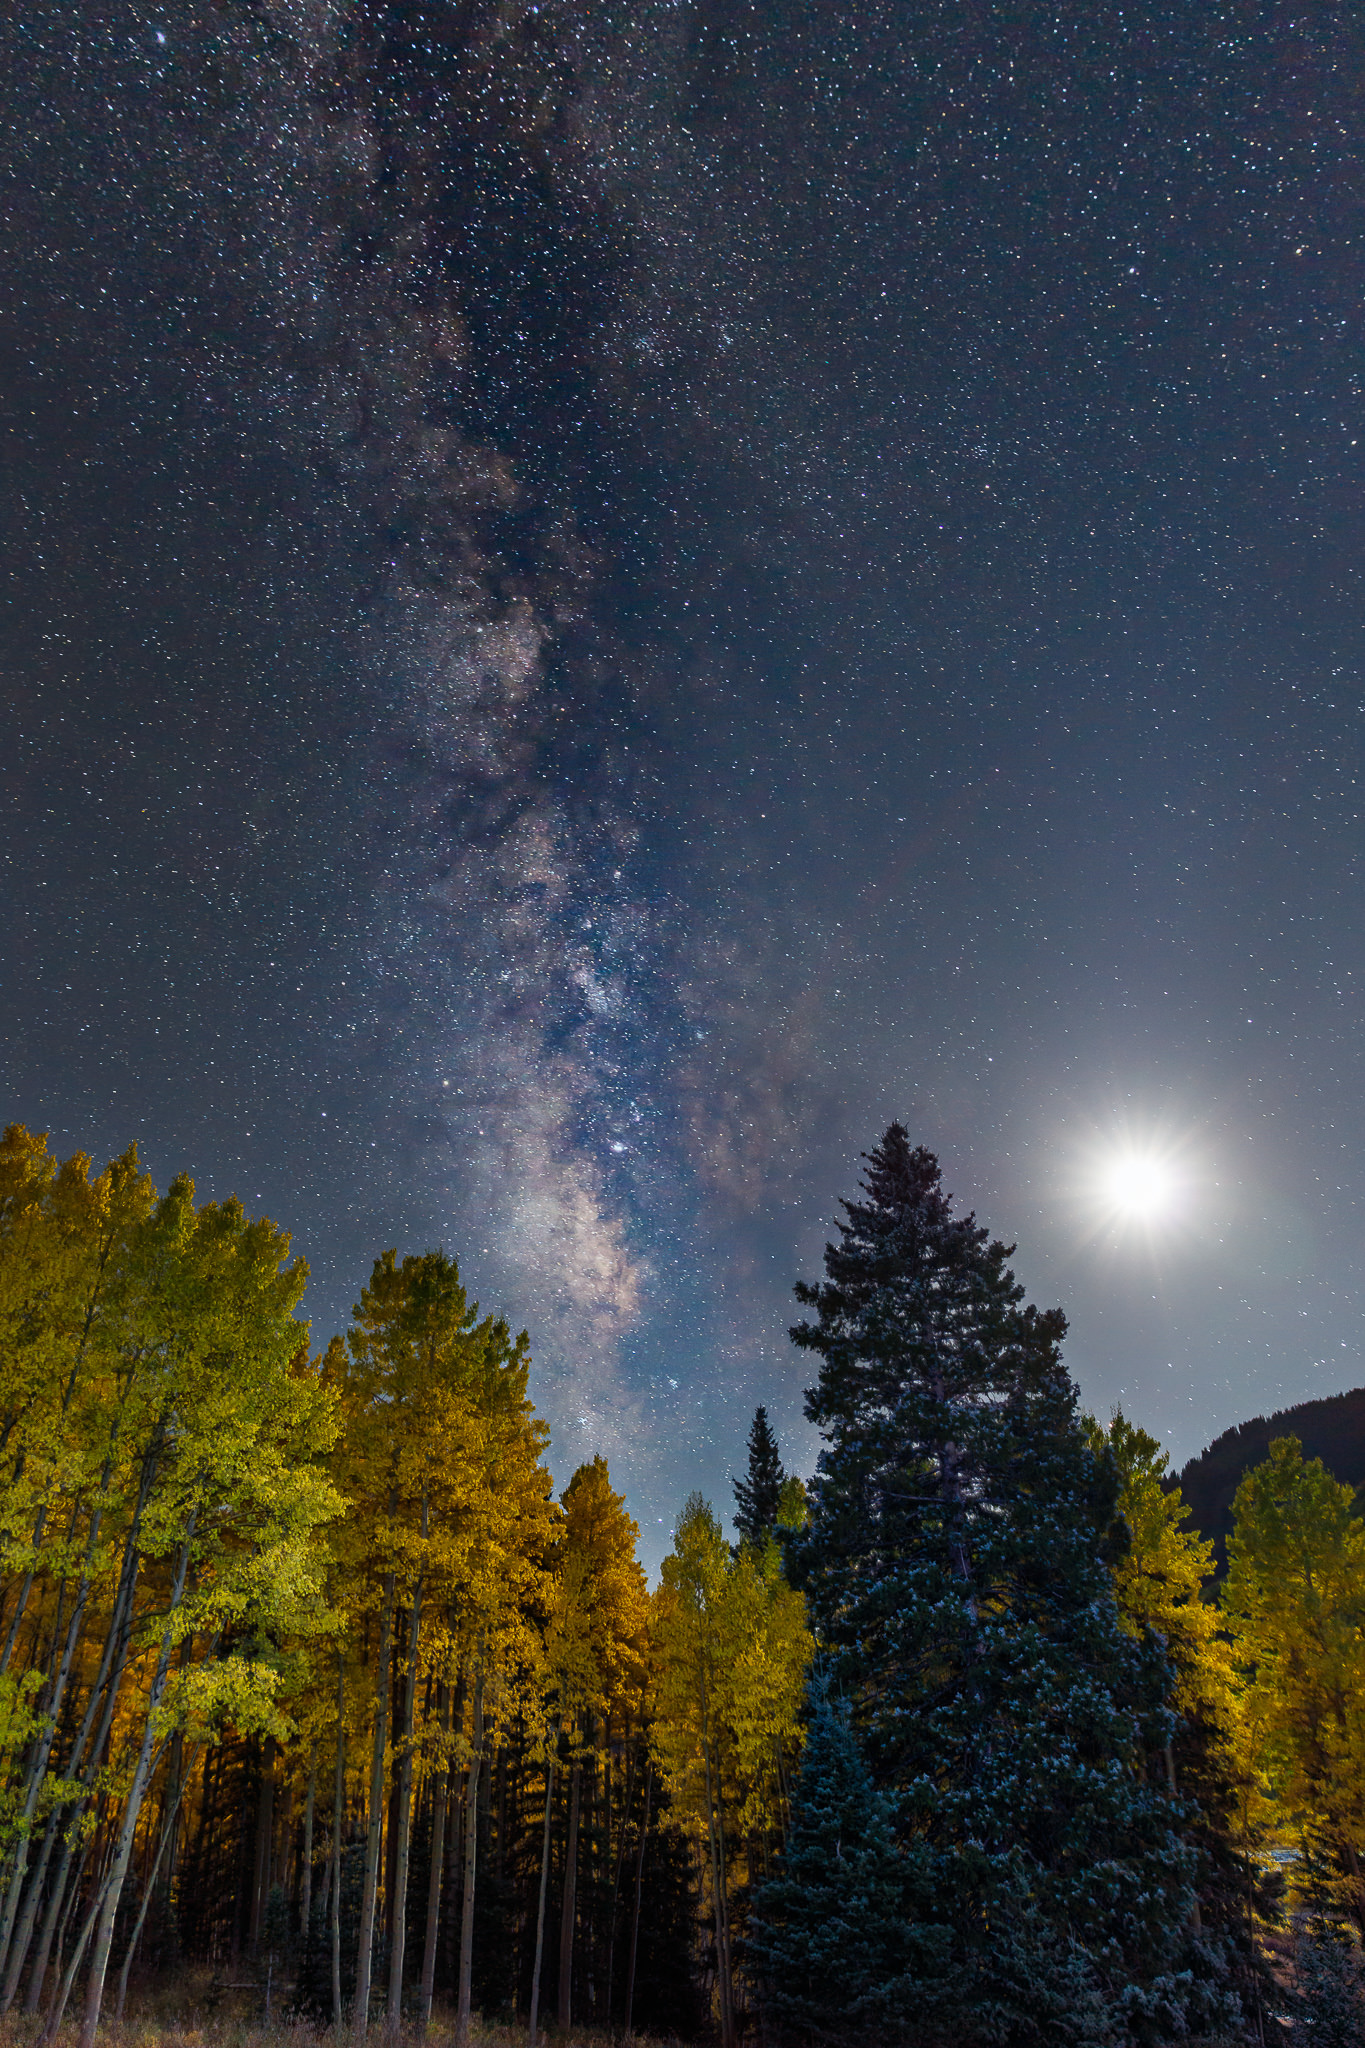
Keep in mind that having the moon out while shooting the night sky is not particularly desirable, as it might spill too much light into the sky and make it difficult to photograph all the details of the Milky Way. However, there are some cases when having the moon out could actually yield interesting results, as the below image shows:
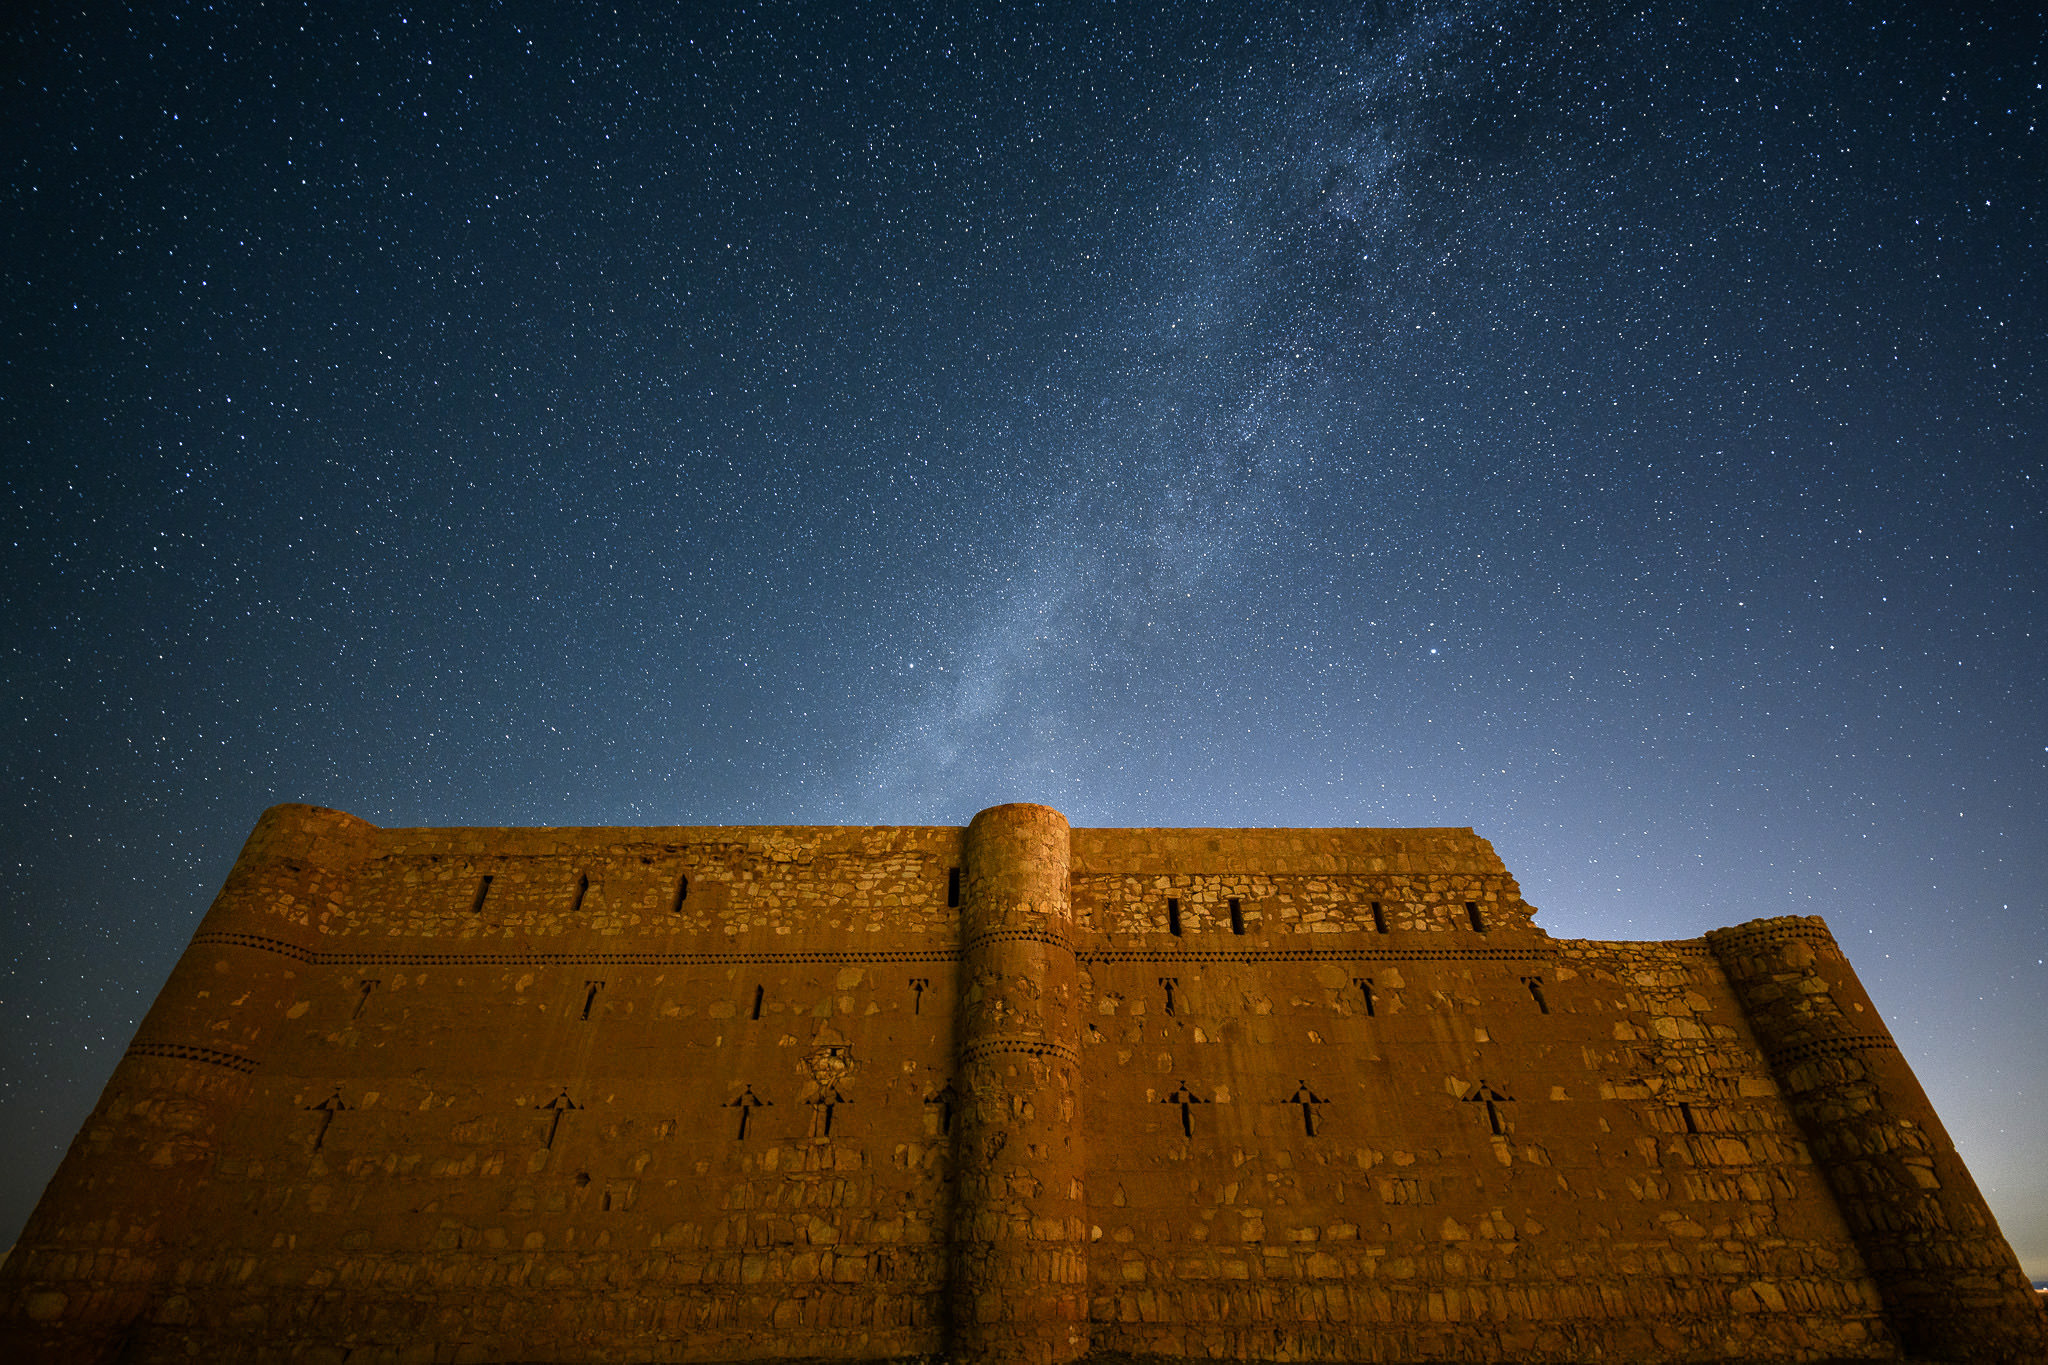
Here is another image captured by Tom Redd, who spent a night at the Arches National Park in Moab, UT and captured the Milky Way with the window arch and other shapes as the foreground elements:
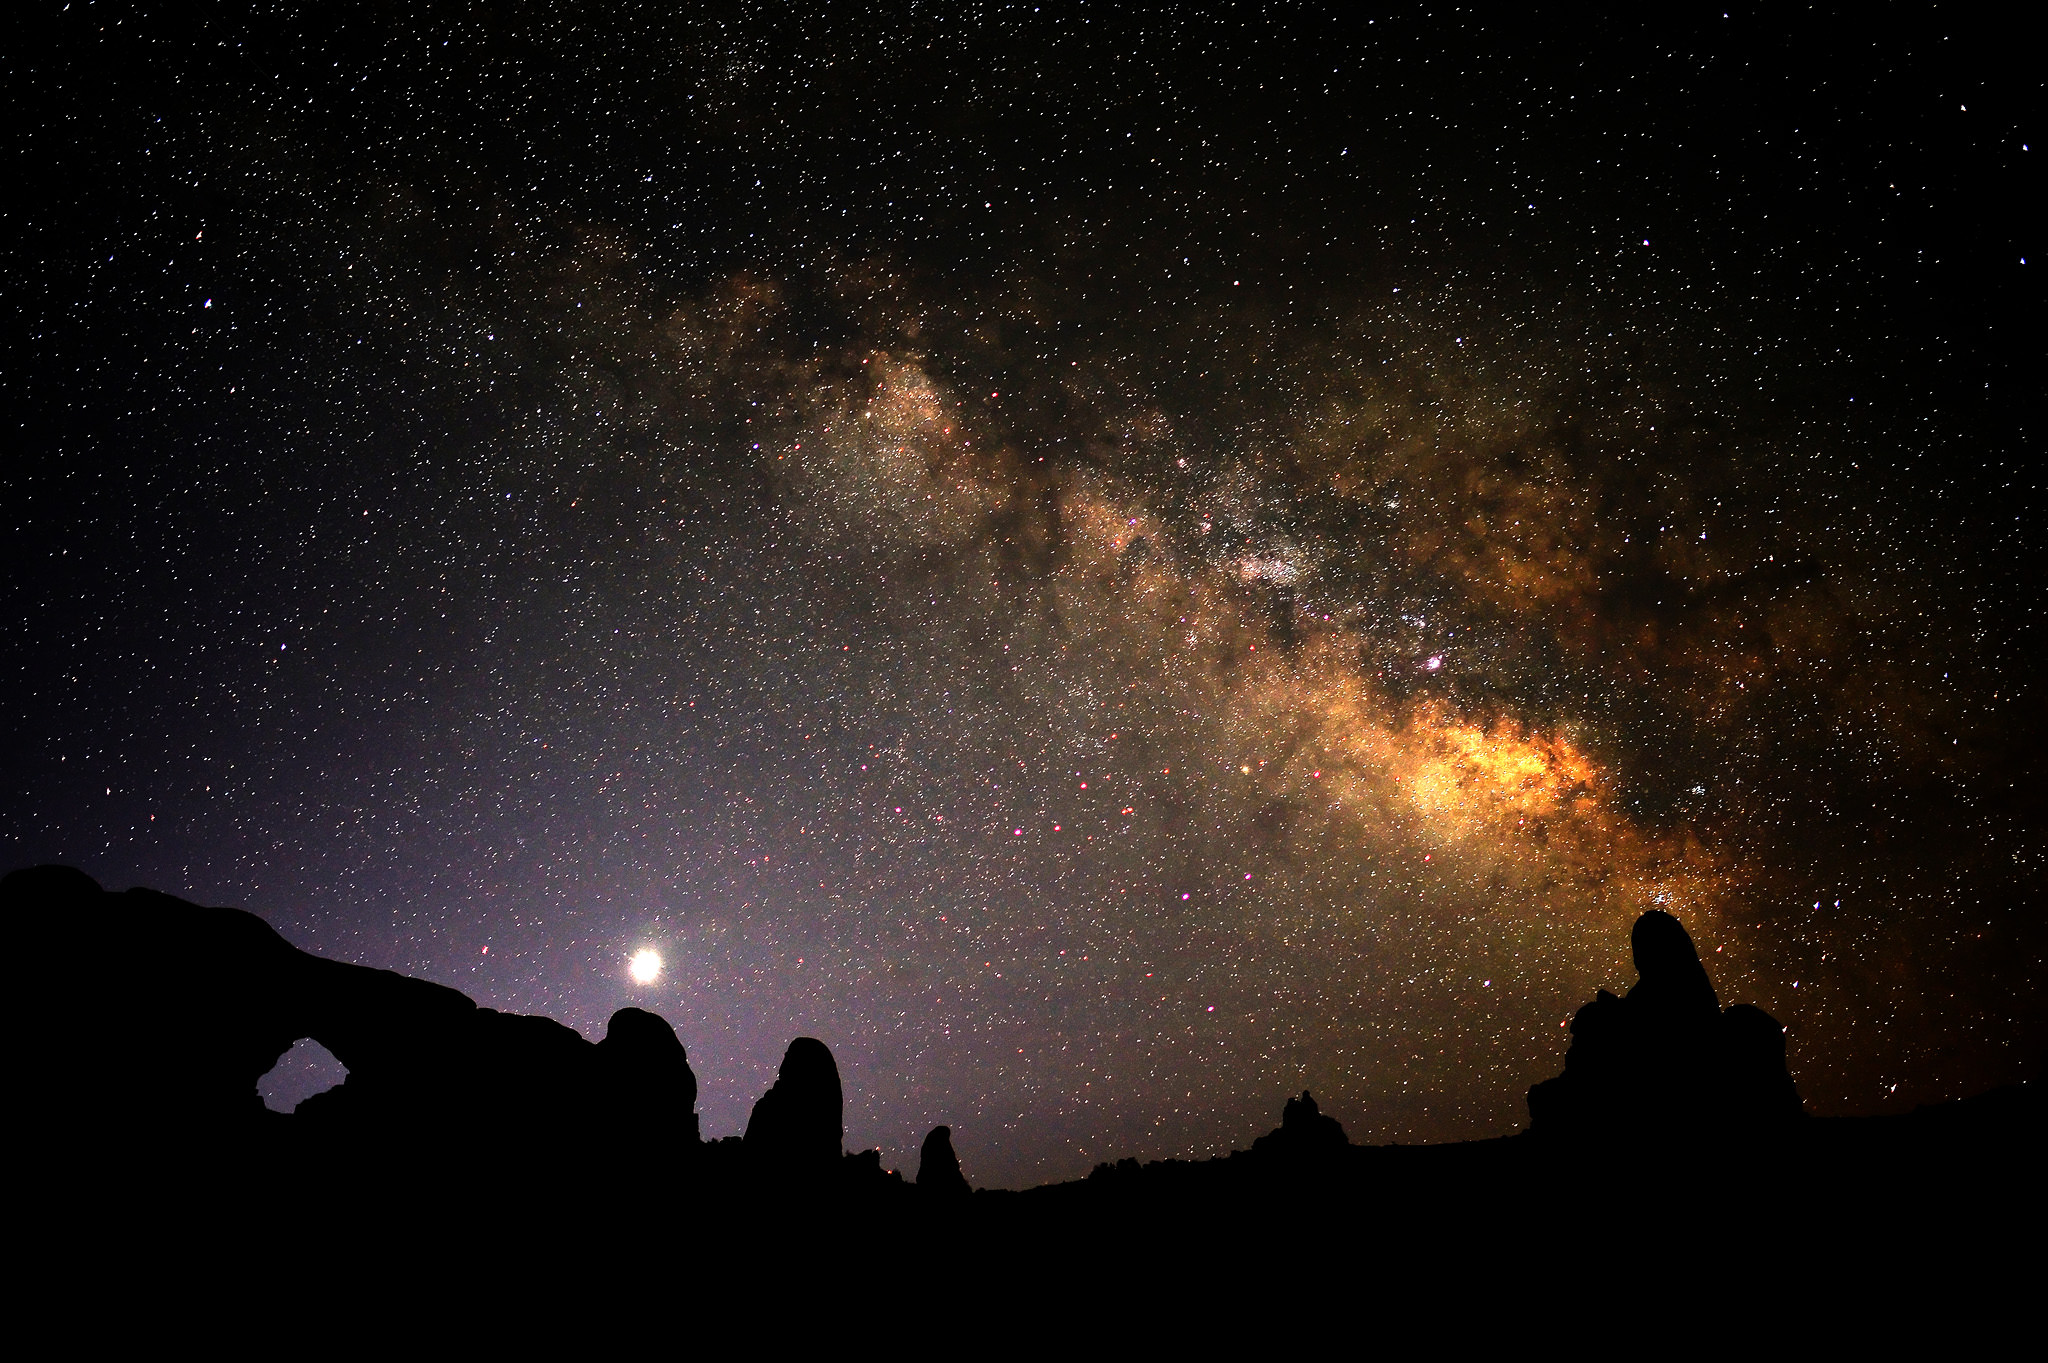
As you can see, he also had the moon in the sky as he captured the image. Tom used a 28mm f/1.8 lens @ f/2, ISO 1600 and 15 second exposure, and as you can see, the Milky Way is seen quite well after the details were brought out in Photoshop.
In short, it pays off to use an interesting foreground element to complement the Milky Way, so you should try to find something interesting to work with. And don’t let the moon stop you from taking great images of the Milky Way. If it is out and it is not too bright, you could use it to your advantage to illuminate foreground elements, or perhaps make it part of your final image.
Post-Processing
Post-processing is a big part of astrophotography, because your camera will capture a low-contrast sky that needs some work. This means that you will need to play with different settings to bring out the details, increase contrast and colors. Take a quick look at the “before and after” shots of the first image above:

The picture on the left is what the camera captured and the picture on the right is what I made it look like after some adjustments in Photoshop. Hard to believe that so much more detail can be brought out from images, but it actually did not take me long to get there. All I did was change white balance towards blues, then opened up the “Levels” tool in Photoshop and changed the sliders a bit to increase contrast and bring out the missing details:
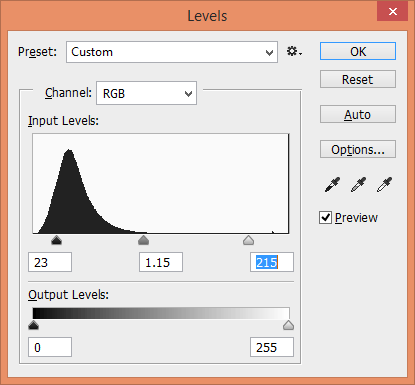
You can achieve similar results by playing with the Curves panel in Lightroom and you can bright out the details of the Milky Way by using the Adjustment Brush and adding things like contrast and structure to it – just experiment a little! Once you are done, resize the image to the resolution you want, sharpen it up a tad (but don’t overdo it) and you should have a pretty presentable image of the Milky Way.
